CLEAN BURN CB-2800 Wartungshandbuch
Stöbern Sie online oder laden Sie Wartungshandbuch nach Warmwasserbereiter & Kessel CLEAN BURN CB-2800 herunter. CLEAN BURN CB-2800 Service manual Benutzerhandbuch
- Seite / 79
- Inhaltsverzeichnis
- LESEZEICHEN
- SERVICE MANUAL 1
- Condential 2
- Comparison List 3
- Table of Content 4
- Introduction 7
- 1-2 Compatible Mode 8
- Disassembly Process 10
- 2-3 Disassemble Lamp 11
- 2-2 Disassemble Lamp 11
- Cover Module 11
- 2-4 Disassemble Top Cover 12
- (Not for ES526L/EX536L/ 13
- DS316L) 13
- 2-6 Disassemble Zoom Ring 13
- 2-5 Disassemble Keypad 13
- Board Module 13
- 2-7 Disassemble Top 14
- Shielding 14
- 2-8 Disassemble Main Board 14
- from IO Cover 15
- 2-9 Disassemble Main Board 16
- Shielding 16
- 2-10 Disassemble Front 17
- Cover Module and IR 17
- Sensor Board 17
- 2-11 Disassemble Engine 17
- 2-12 Disassemble Color 18
- Wheel Module 18
- 2-13 Disassemble DMD Chip 18
- and DMD Board 18
- 2-14 Disassemble Rod 19
- Module 19
- 2-15 Disassemble Focus 19
- Ring 19
- 2-16 Disassemble Fan 20
- 2-18 Disassemble LVPS 21
- 2-19 Disassemble IO Cover 22
- and Security Bar 22
- 2-20 Disassemble Interlock 23
- Switch 23
- 2-21 Disassemble Lamp 23
- Driver Module 23
- 2-22 Disassemble Bottom 24
- Shielding 24
- 2-23 Disassemble Speaker 25
- 2-24 Rod Adjustment 25
- 2-25 Re-write Lamp Usage 26
- Trobleshooting 27
- 3-2 Main Procedure 28
- No Symptom Procedure 29
- 4-1 Test Equipment Needed 32
- 4-2 Service Mode 32
- 4-3 OSD Reset 32
- For EX536/EX536L 33
- 4-4 Test Condition 33
- For EX531 34
- 4-4-2 Burn-In Test 35
- 4-5 Test Inspection Procedure 36
- 4-6 PC MODE 36
- 2. Light Leak 37
- 3. Dead Pixel (Bright pixel) 38
- 4. Dead Pixel (Dark pixel) 38
- 5. Blemish (Bright) 39
- 6. Blemish (Dark) 39
- 7. Focus test 39
- 4-7 Video Performance 40
- 2. S-Video (not for CB2800) 41
- 3. HDTV/ Component 41
- 1. Test equipment 42
- 2. Brightness 42
- 3. Full On/Full Off Contrast 43
- 4. Uniformity 43
- 4-9 Others 44
- Firmware Upgrade 45
- Procedure 46
- 5. Click "Next" 47
- 6. Click "Next" 47
- status 47
- 8. Click "Finish" 47
- 5-2-1 Equipment Needed 52
- 5-2-2 NLINK Setup Procedure 53
- 5-2-3 USB Driver Upgrade 55
- Procedure 55
- 5-2-4 8051 Firmware Upgrade 57
- EDID Upgrade 59
- 6-2 Equipment Needed 60
- 6-3 Setup Procedure 61
- 6-4 EDID Key-In Procedure 62
- Appendix A (Exploded Image) 64
- D.C. EX536 66
- ASSY TOP COVER MODULE 68
- ASSY FAN SHIELDING MODULE 70
- ASSY BOTTOM COVER MODULE 71
- ASSY ENGINE MODULE 73
- ASSY COLOR WHEEL MODULE Z15 75
- Appendix B 78
- II. PCBA Code Denition 79
Inhaltsverzeichnis
SERVICE MANUALPrepare : Check: Approve: Date Revise Version Description2009.05.14 V1.0 Initial Issue2009.11.10 V2.0
ES526/EX536/EX531/CB2800/ES526L/EX536L/DS316LCondential2-1Chapter 2Disassembly Process2-1 Equipment Needed & Product Overview1. Screw Bit (+): 1
ES526/EX536/EX531/CB2800/ES526L/EX536L/DS316LCondential2-22-3 Disassemble Lamp Module1. Unfasten 2 screws (as red circle) on the Lamp Mo
ES526/EX536/EX531/CB2800/ES526L/EX536L/DS316LCondential2-32-4 Disassemble Top Cover Module1. Unscrew 2 screws (as red circle) from the Bottom Cover
ES526/EX536/EX531/CB2800/ES526L/EX536L/DS316LCondential2-42-6 Disassemble Zoom Ring1. Unscrew 3 screws (as red circle) from the Top Cover Modu
ES526/EX536/EX531/CB2800/ES526L/EX536L/DS316LCondential2-52-7 Disassemble Top Shielding1. Unscrew 9 screws (as red circle).2. Tear off 3M tape (as b
ES526/EX536/EX531/CB2800/ES526L/EX536L/DS316LCondential2-65. Unscrew 4 hex screws (as green circle) from IO Cover.6. Unplug 5 connectors (as ye
ES526/EX536/EX531/CB2800/ES526L/EX536L/DS316LCondential2-77. Unplug 1 connector (as orange square).8. Remove the Main Board Module.2-9 Disassemble Ma
ES526/EX536/EX531/CB2800/ES526L/EX536L/DS316LCondential2-82-10 Disassemble Front Cover Module and IR Sensor Board1. Unscrew 1 screw (as red circle).
ES526/EX536/EX531/CB2800/ES526L/EX536L/DS316LCondential2-92-12 Disassemble Color Wheel Module1. Unscrew 2 screws (as red circle) to disass
ES526/EX536/EX531/CB2800/ES526L/EX536L/DS316LCondential2-102-14 Disassemble Rod Module1. Unscrew 2 screws (as green circle) to tak
ES526/EX536/EX531/CB2800/ES526L/EX536L/DS316LCondentialIPrefaceThis manual is applied to ES526/EX536/EX531/CB2800/ES526L/EX536L/DS316L projection sys
ES526/EX536/EX531/CB2800/ES526L/EX536L/DS316LCondential2-112-16 Disassemble Fan Module1. Unscrew 3 screws (as red circle) to
ES526/EX536/EX531/CB2800/ES526L/EX536L/DS316LCondential2-122-18 Disassemble LVPS Module1. Unscrew 6 screws (as red circle).2. Unplug 2
ES526/EX536/EX531/CB2800/ES526L/EX536L/DS316LCondential2-134. Tear off 1 mylar (as green square).2-19 Disassemble IO Cover and Security Bar
ES526/EX536/EX531/CB2800/ES526L/EX536L/DS316LCondential2-142-20 Disassemble Interlock Switch1. Unscrew 1 screw (as red circle) to d
ES526/EX536/EX531/CB2800/ES526L/EX536L/DS316LCondential2-152-22 Disassemble Bottom Shielding1. Unscrew 3 screws (as red cricle) to
ES526/EX536/EX531/CB2800/ES526L/EX536L/DS316LCondential2-162-23 Disassemble Speaker (Not for ES526L/EX536L)1. Unscrew 2 screws (as yellow cir
ES526/EX536/EX531/CB2800/ES526L/EX536L/DS316LCondential2-172-25 Re-write Lamp Usage Hour1. Get into service mode - Press "Power", "
ES526/EX536/EX531/CB2800/ES526L/EX536L/DS316LCondential3-1Chapter 3TrobleshootingMessagePower LED(Red / Green)Temp LED(Red)Lamp LED(Red)Standby State
ES526/EX536/EX531/CB2800/ES526L/EX536L/DS316LCondential3-23-2 Main ProcedureNo Symptom Procedure1 No Power- Ensure the Power Cord and AC Power Outle
ES526/EX536/EX531/CB2800/ES526L/EX536L/DS316LCondential3-3No Symptom Procedure4 No Image- Ensure the Signal Cable and Source work (If you connect mu
ES526/EX536/EX531/CB2800/ES526L/EX536L/DS316LCondentialIIES526/EX536/EX531/CB2800/ES526L/EX536L/DS316L Comparison List Parts EX531 EX536 EX536L ES526
ES526/EX536/EX531/CB2800/ES526L/EX536L/DS316LCondential3-4No Symptom Procedure9Poor Uniformity/Shadow- Ensure the projection screen without dirt- Ens
ES526/EX536/EX531/CB2800/ES526L/EX536L/DS316LCondential3-5No Symptom Procedure15Forgetting Password (administrator Password)- If you forget
ES526/EX536/EX531/CB2800/ES526L/EX536L/DS316LCondential4-1Chapter 4Function Test & Alignment Procedure4-1 Test Equipment Needed- IBM PC with SVGA
ES526/EX536/EX531/CB2800/ES526L/EX536L/DS316LCondential4-2Order Symptom Pattern Criteria1 Bright pixel ( dots) Gray 10 pattern A+B=02 Dark pixel(dot
ES526/EX536/EX531/CB2800/ES526L/EX536L/DS316LCondential4-3Order Symptom Pattern Criteria5 Bright blemish (Dirty) Gray 10 patternA+B≤2 (diameter <1
ES526/EX536/EX531/CB2800/ES526L/EX536L/DS316LCondential4-4Order Symptom Pattern Criteria3 Unstable pixel (dots) Any pattern A+B=04 Adjacent dark pixe
ES526/EX536/EX531/CB2800/ES526L/EX536L/DS316LCondential4-54-5 Test Inspection ProcedureUpdateChange partsMain Board Firmware Color Wheel Lamp Module
ES526/EX536/EX531/CB2800/ES526L/EX536L/DS316LCondential4-61. Frequency and tracking boundaryProcedure - Test equipment: video generator - Test
ES526/EX536/EX531/CB2800/ES526L/EX536L/DS316LCondential4-7leakage is brighter than full black pattern. - Using Black pattern, the light leak is a
ES526/EX536/EX531/CB2800/ES526L/EX536L/DS316LCondential4-85. Blemish (Bright) Procedure - Test equipment: video generator - Test signal: analog
ES526/EX536/EX531/CB2800/ES526L/EX536L/DS316LCondentialIIITable of ContentChapter 1 Introduction Highlight 1-1 Compatible
ES526/EX536/EX531/CB2800/ES526L/EX536L/DS316LCondential4-98. Color performance Procedure - Test equipment: video generator. - Test signal: 48
ES526/EX536/EX531/CB2800/ES526L/EX536L/DS316LCondential4-10 - Check the sound from speakers. - Check if "freeze" and "mute"
ES526/EX536/EX531/CB2800/ES526L/EX536L/DS316LCondential4-11Inspection item - Audio performance testInspection Distance - 1.8 M ~2.5 MCriteria
ES526/EX536/EX531/CB2800/ES526L/EX536L/DS316LCondential4-12Full white patternFull black pattern - Follow the brightness formula to calculate
ES526/EX536/EX531/CB2800/ES526L/EX536L/DS316LCondential4-134-9 Others1. Function InspectionGeneral - All OSD functions must be checked for funct
ES526/EX536/EX531/CB2800/ES526L/EX536L/DS316LCondential5-1Chapter 5Firmware UpgradeSection 1: System Firmware Upgrade5-1-1 Equipment NeededSoftware:
ES526/EX536/EX531/CB2800/ES526L/EX536L/DS316LCondential5-25-1-2 DLP Composer Lite Setup Procedure 1. Choose "DLP Composer Lite V7.1 Setup&quo
ES526/EX536/EX531/CB2800/ES526L/EX536L/DS316LCondential5-35. Click "Next".6. Click "Next".7. The program is executing "insta
ES526/EX536/EX531/CB2800/ES526L/EX536L/DS316LCondential5-45-1-3 Firmware Upgrade Procedure1. Set-up - Hold on "POWER" button and plug i
ES526/EX536/EX531/CB2800/ES526L/EX536L/DS316LCondential5-54. Click "Library". - Click the "Browse" and navigate to the direct
ES526/EX536/EX531/CB2800/ES526L/EX536L/DS316LCondentialIV Disassemble Bottom Shielding 2-15 Disassemble Speaker (Not for ES526L/EX
ES526/EX536/EX531/CB2800/ES526L/EX536L/DS316LCondential5-68. Choose "Flash Loader". - Click "Browse" to search the rmware l
ES526/EX536/EX531/CB2800/ES526L/EX536L/DS316LCondential5-712. It takes about 8 minutes, the rmware upgrade process is nished, "Download
ES526/EX536/EX531/CB2800/ES526L/EX536L/DS316LCondential5-8Section 2: 8051 Firmware Upgrade Procedure5-2-1 Equipment NeededSoftware: (DDP 2431- USB)-
ES526/EX536/EX531/CB2800/ES526L/EX536L/DS316LCondential5-95-2-2 NLINK Setup Procedure 1. Choose "setup_NLINK_en.exe" Program.2. Click &qu
ES526/EX536/EX531/CB2800/ES526L/EX536L/DS316LCondential5-105. Click "Next". - Select the additional task that you may create a de
ES526/EX536/EX531/CB2800/ES526L/EX536L/DS316LCondential5-11(1)(3)(2)5-2-3 USB Driver Upgrade Procedure1. Set-up - Plug in the power c
ES526/EX536/EX531/CB2800/ES526L/EX536L/DS316LCondential5-12 (7) Click "Next". (8) Click "Continue Anyway". (9) Click &qu
ES526/EX536/EX531/CB2800/ES526L/EX536L/DS316LCondential5-135-2-4 8051 Firmware Upgrade Procedure1. Execute 8051 FW Program - Double clic
ES526/EX536/EX531/CB2800/ES526L/EX536L/DS316LCondential5-144. Choose 8051 le (*.hex) - Click "Open". - Select the 8051 le where you
ES526/EX536/EX531/CB2800/ES526L/EX536L/DS316LCondential6-1Chapter 6EDID Upgrade6-1 EDID IntroductionExtended Display Identication Data is a VESA sta
ES526/EX536/EX531/CB2800/ES526L/EX536L/DS316LCondentialV USB Driver Upgrade Procedure 5-11 8051 Firmware Upgrade Prodedure
ES526/EX536/EX531/CB2800/ES526L/EX536L/DS316LCondential6-26-2 Equipment NeededSoftware- EDID Program - EDID File (*.ini)Hardware - Projector - P
ES526/EX536/EX531/CB2800/ES526L/EX536L/DS316LCondential6-36-3 Setup Procedure 1. Connect all ports (1) Connect P1 of xture with COM Port of
ES526/EX536/EX531/CB2800/ES526L/EX536L/DS316LCondential6-46-4 EDID Key-In Procedure1. Execute EDID Program - Double click "EDID" to exec
ES526/EX536/EX531/CB2800/ES526L/EX536L/DS316LCondential6-53. Change the cable to VGA1 - When the message "Please change the cable to V
ES526/EX536/EX531/CB2800/ES526L/EX536L/DS316LCondentialI26327Note: This chapter is only designed to show the exploded image of the projector. For upd
ES526/EX536/EX531/CB2800/ES526L/EX536L/DS316LCondentialIIItem P/N Description Parts Supply1 70.8EH01G001 ASSY TOP COVER MODULE ES5262 70.8EH03G001 AS
ES526/EX536/EX531/CB2800/ES526L/EX536L/DS316LCondentialIIID.C. EX5362632726
ES526/EX536/EX531/CB2800/ES526L/EX536L/DS316LCondentialIVItem P/N Description Parts Supply1 70.8EH01G001 ASSY TOP COVER MODULE ES5262 70.8EH03G001 AS
ES526/EX536/EX531/CB2800/ES526L/EX536L/DS316LCondentialVASSY TOP COVER MODULE 2 15 3 1 10 9 8 7 6 5 4 11 12 13 14
ES526/EX536/EX531/CB2800/ES526L/EX536L/DS316LCondentialVIItem P/N Description Parts Supply1 51.8EH09G001 METAL DOME ES5262 80.8EH03G001 PCBA KEYPAD B
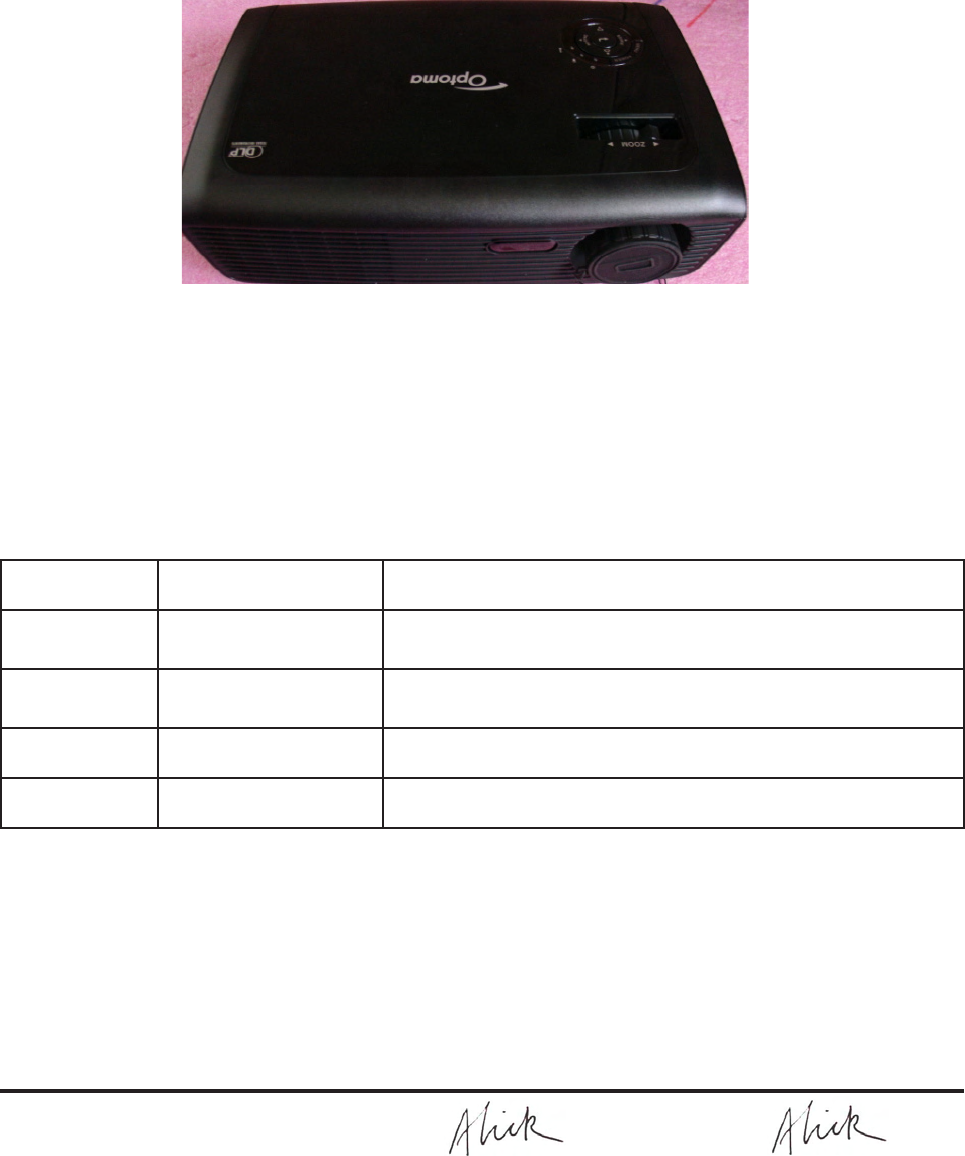
ES526/EX536/EX531/CB2800/ES526L/EX536L/DS316L 1-1Chapter 1Introduction No 1
ES526/EX536/EX531/CB2800/ES526L/EX536L/DS316LCondentialVIIASSY FAN SHIELDING MODULE 1 3 4 5 6Item P/N Description Parts Supply1 49.88T01G001SUNON, KD
ES526/EX536/EX531/CB2800/ES526L/EX536L/DS316LCondentialVIIIASSY BOTTOM COVER MODULE
ES526/EX536/EX531/CB2800/ES526L/EX536L/DS316LCondentialIXItem P/N Description Parts Supply1 51.80S21G011 ADJUST FOOT PC+ABS TDP-T92 75.8AA04G001 BUY
ES526/EX536/EX531/CB2800/ES526L/EX536L/DS316LCondentialXASSY ENGINE MODULE
ES526/EX536/EX531/CB2800/ES526L/EX536L/DS316LCondentialXIItem P/N Description Parts Supply70.8EH14GR01 ASSY ENGINE MODULE FOR ES526 (SERVICE) V1 23.8
ES526/EX536/EX531/CB2800/ES526L/EX536L/DS316LCondentialXIIASSY COLOR WHEEL MODULE Z15Item P/N Description Parts Supply70.8EH15GR01ASSY COLOR WHEEL MO
ES526/EX536/EX531/CB2800/ES526L/EX536L/DS316LCondentialXIII 1 2 3 4 5 6 7 8 9 10 11 12 13 13A.K.
ES526/EX536/EX531/CB2800/ES526L/EX536L/DS316LCondentialXIVItem P/N Description Parts Supply1 DC.8EH01G00E D.C. ES5262 75.8CS02G001 LENS CAP MODULE PD
ES526/EX536/EX531/CB2800/ES526L/EX536L/DS316LCondentialIAppendix B I. Serial Number System DenitionSerial Number Format for Projector (take ES526 as
ES526/EX536/EX531/CB2800/ES526L/EX536L/DS316LCondentialIIII. PCBA Code DenitionPCBA Code for ProjectorA B XXXXXXXXXX C XXX EEEE 1 2
ES526/EX536/EX531/CB2800/ES526L/EX536L/DS316L 1-2No
ES526/EX536/EX531/CB2800/ES526L/EX536L/DS316L1-3Computer Compatibility (Analog)
Weitere Dokumente für Warmwasserbereiter & Kessel CLEAN BURN CB-2800

© 2020, manymanuals.de. Alle Rechte vorbehalten. | 1.355 s |
 Manymanuals.com
 Manymanuals.de
 Manymanuals.fr
 Manymanuals.it
 Manymanuals.pl
 Manymanuals.cz
 Manymanuals.es
 Manymanuals-pt.com
Kommentare zu diesen Handbüchern